This year for Christmas I decided to gift the boys a rock climbing area. It was a really fun project and perfect for our unfinished basement. I’ll show you how I made this cost effective climbing wall.


Looking for a fun way to use up some basement space and burn off kid energy during the colder months? Here’s how we built our own indoor climbing wall—easy enough to tackle in a weekend if you have the materials ready!
Step 1: Buy the Climbing Rocks
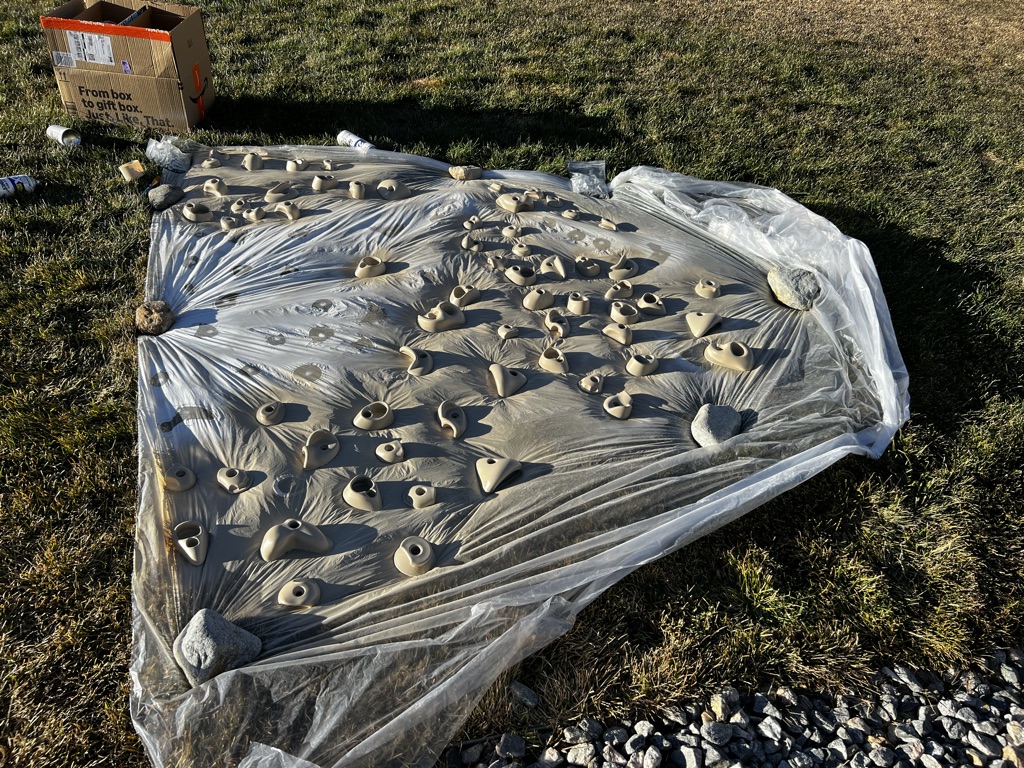
I ordered a pack of 32 climbing holds from Amazon (we used two packs for a total of 64). They came with all the hardware needed for installation and were easy to organize and prep.
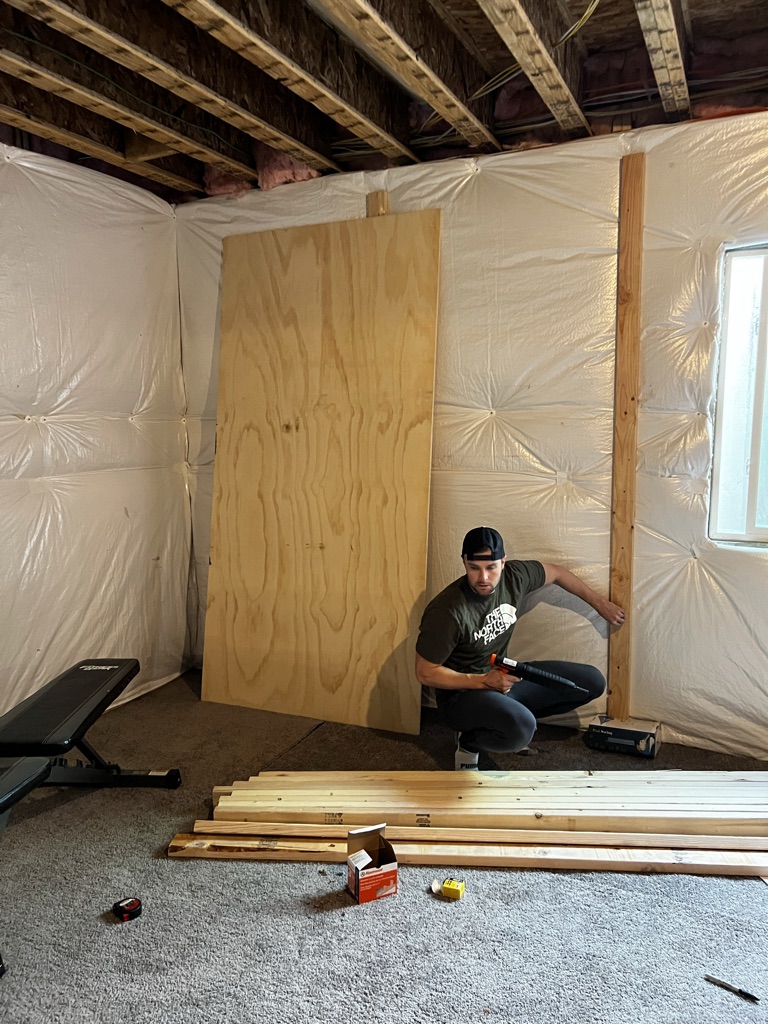
Step 2: Prep the Wall
Since our climbing wall lives in an unfinished basement, we had to attach everything to concrete. We used a Ramset concrete nailer (picked up at Home Depot) to secure seven 2x4s directly into the concrete wall.
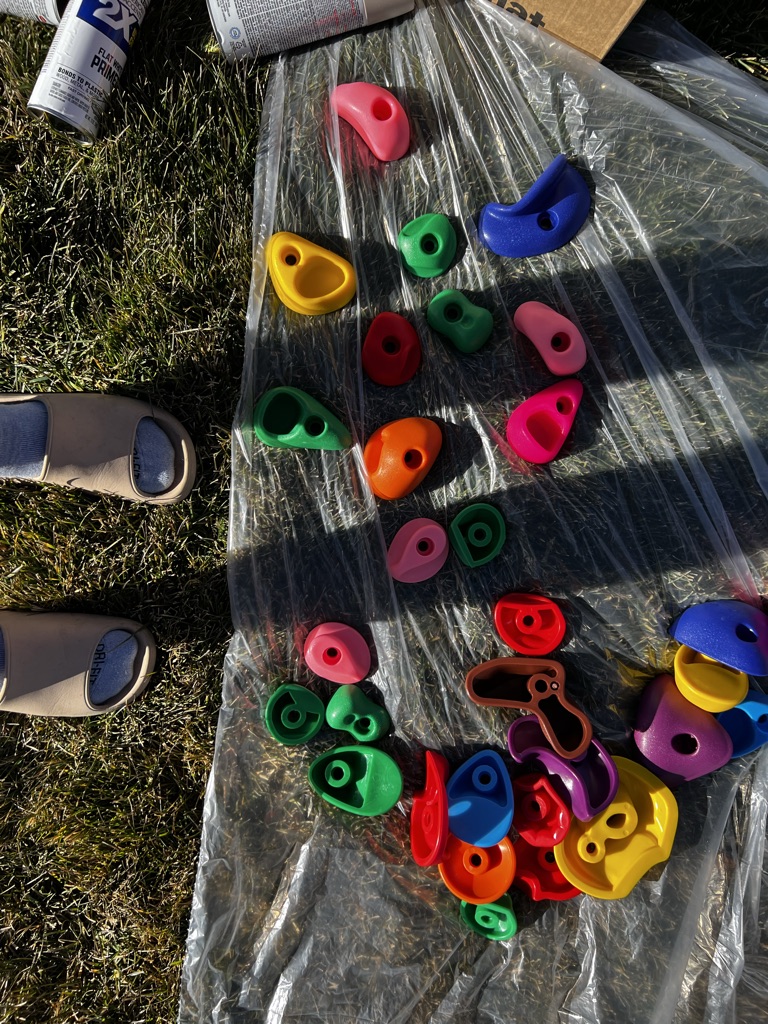
Step 3: Paint the Climbing Holds
To match our basement’s vibe, I spray-painted the holds. First, I used Rust-Oleum primer, followed by a tan spray paint I liked. This step is optional, but it helped everything look more cohesive.
Step 4: Mount the Plywood
We used four sheets of plywood, screwing them into the 2x4s. (Here’s the plywood we used if you want to check it out.)
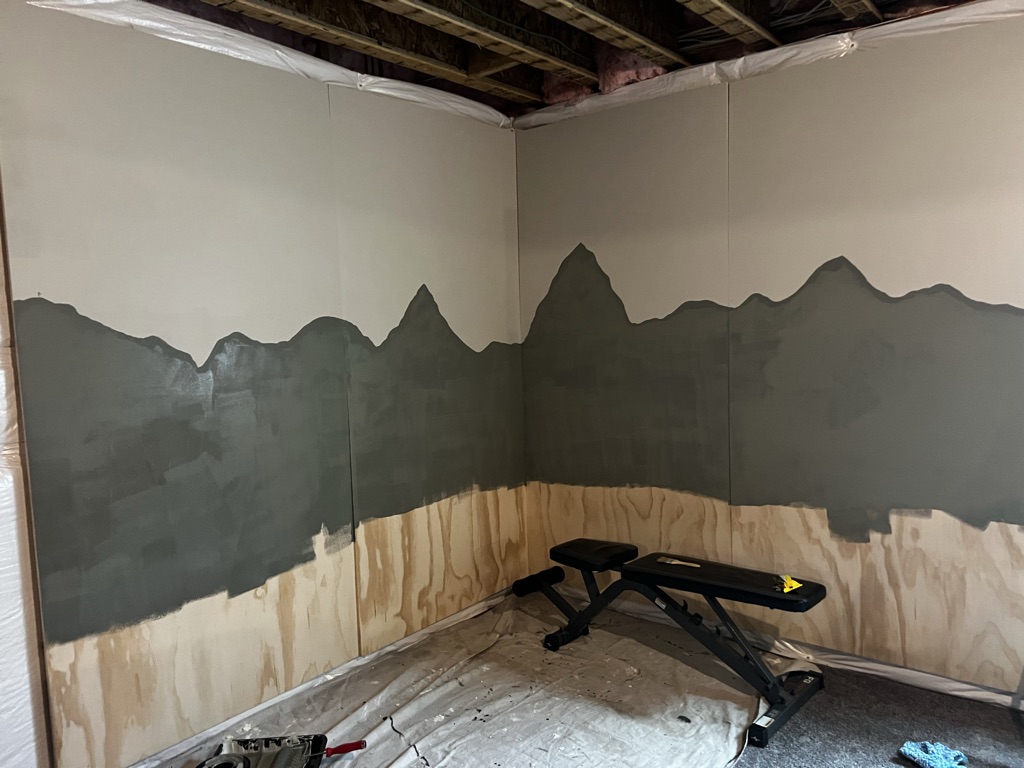
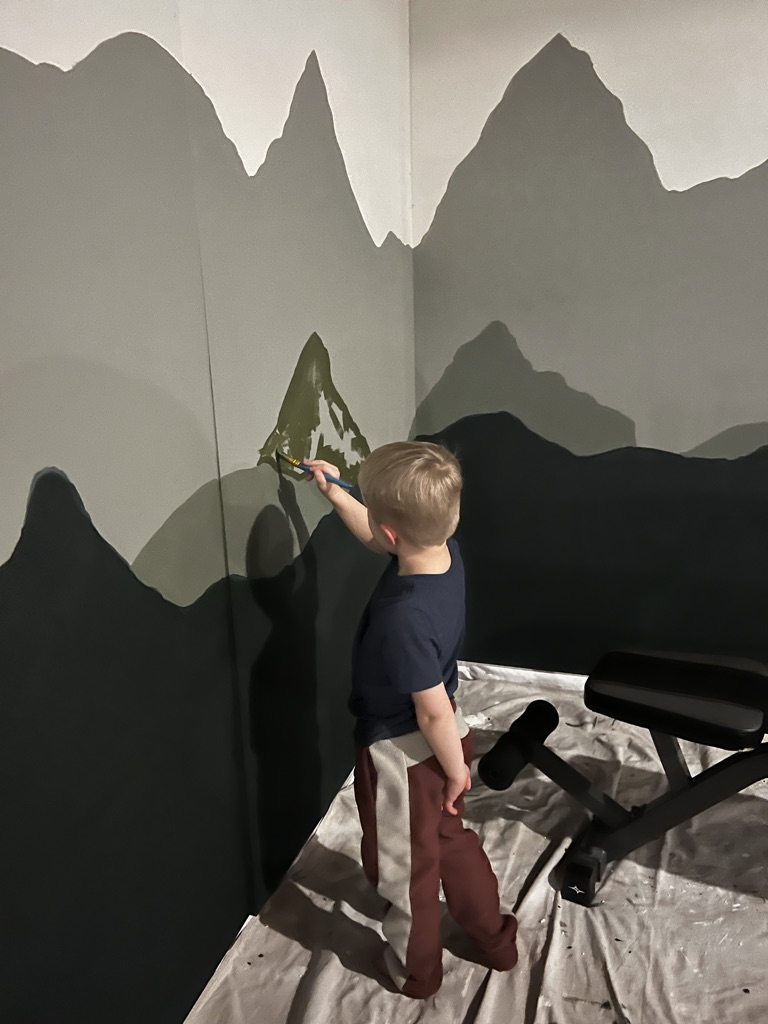
Step 5: Create the Mural
I used leftover paint samples to create a mountain-themed mural. It’s in the basement, so I didn’t stress too much—just freehanded the design and even let our 4-year-old help. It made the project even more special!
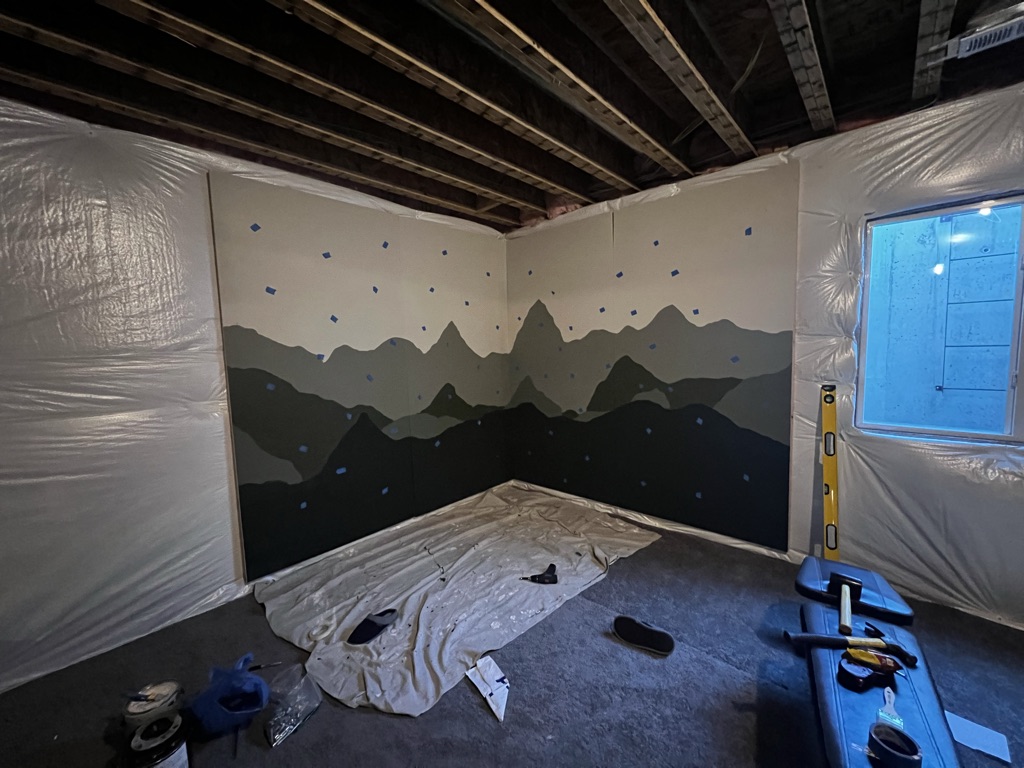
Step 6: Map the Rock Layout
Using blue painter’s tape, I mapped out all 64 holds. I tried to create one “easy” route and one “harder” one for some built-in variety.
Step 7: Drill the Holes
Once I had everything mapped, we took down the plywood and drilled 64 holes. Each climbing hold came with a locking insert (I’m sure there’s a technical name for it, and if you need it, you are on the wrong blog). We hammered those inserts into the back of the plywood, then re-attached the boards to the wall.
Step 8: Add the Holds
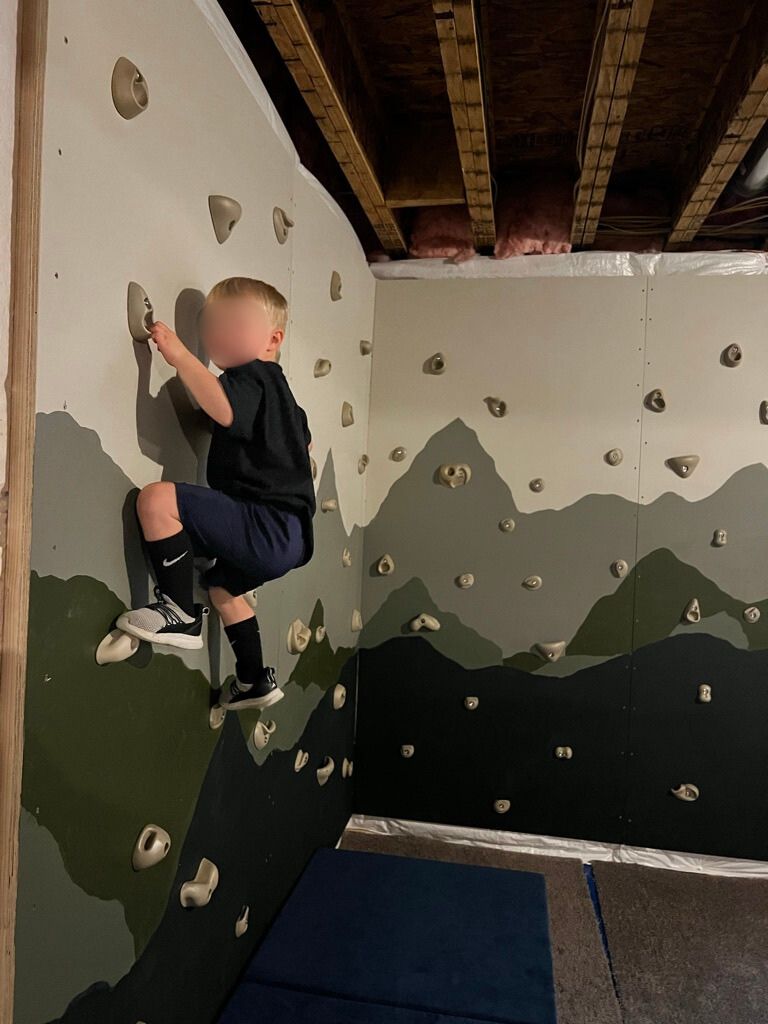
With everything in place, we laid out where we wanted the holds and screwed them in—making sure they were tight and secure. And just like that… ready to climb!
A Few Lessons Learned:
- We use Nugget copycat couch cushions as pads underneath—definitely recommend having some padding because kids love to jump down.
- After 6 months of regular use, the paint on the holds is starting to scrape slightly. Next time, I’d add a clear top coat or sealant on both the wall and the holds to help preserve the finish.
This was such a fun weekend project, and it completely transformed a blank concrete wall into a creative and active play space. It’s been especially great during the winter when we’re stuck indoors.
Let me know if you end up building one—I’d love to see how yours turns out!
Happy building!
XO,
Chloe
FYI – This blog post does contain affiliate links.

Leave a comment